Auto
Fiberglass Front Clip
15/05/13 18:39
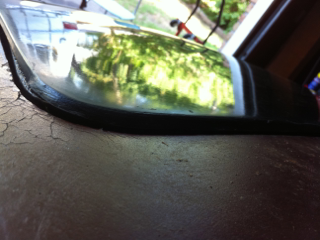
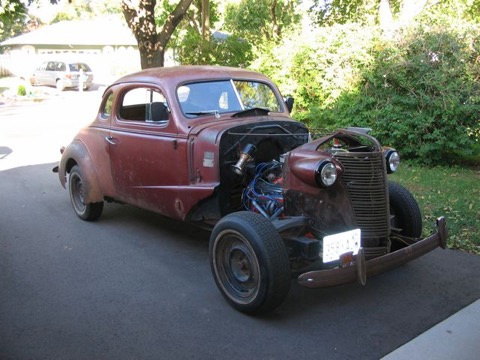
For 43 years my 37 Chevy Coupe has been wearing a grill, radiator shell and hood from a 38 Chevy. This blog entry and later additions will document my efforts to convert it to a fiberglass front clip for the 37 Chev that it is.
Note that the following pic is not what I am installing. I actually bought all of this as parts: separate fenders, hood top, hood sides and radiator shell. Also bought a 37 grill that needs to be mounted. A lot more work to be done.
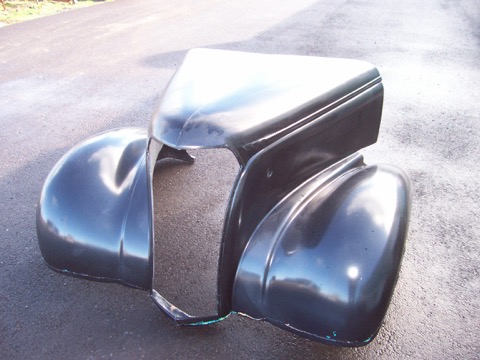
Note that the following pic is not what I am installing. I actually bought all of this as parts: separate fenders, hood top, hood sides and radiator shell. Also bought a 37 grill that needs to be mounted. A lot more work to be done.
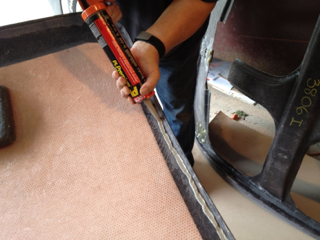
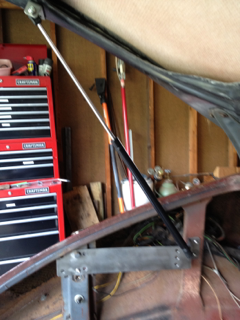
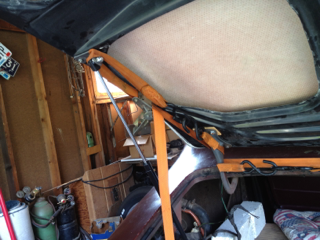
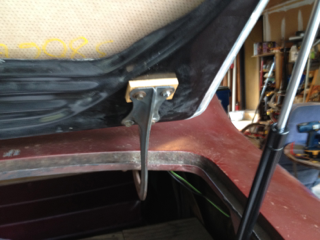
Fiberglass Trunk Lid
07/10/12 13:16
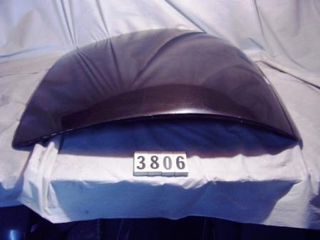
| This article describes the fitting of a fiberglass trunk lid on a 1937 Chevy Coupe. The trunk lid was purchased from Superior Glassworks in Mulino, OR in August 2011. The described installation was completed in August 2012. See http://www.superiorglassworks.com/Trunk-Lid-for-1937-1938-Chevrolet-Coupe-p/3806.htm |

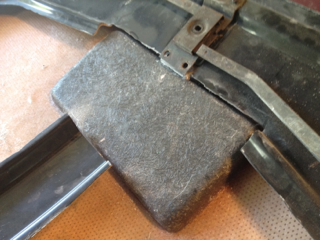

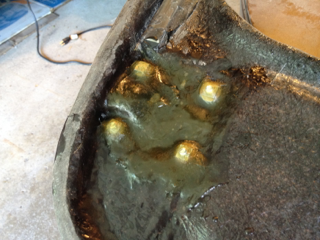
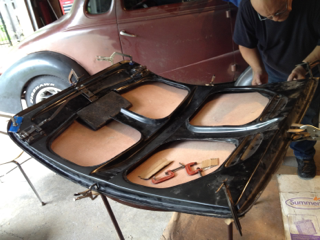

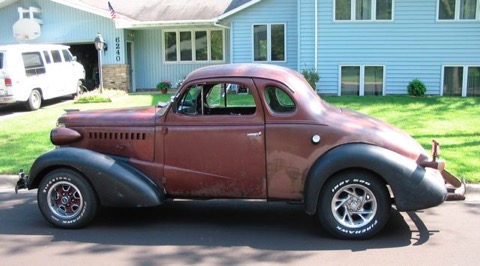
1937 Chevy Update
16/07/12 19:27
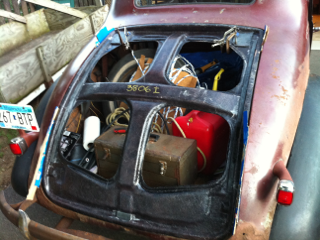
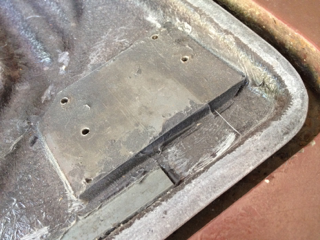
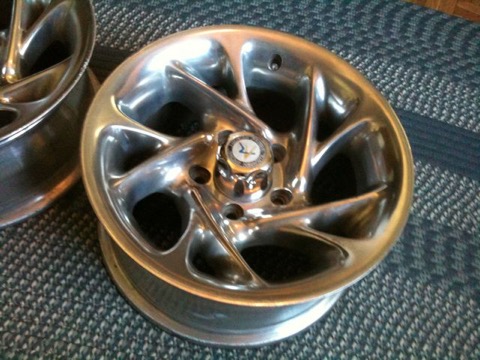
| Just noticed that it has been about a year since I posted about the old car. I did get the frame finished after my last status and got a newer grill and four fiberglass fenders mounted. I bought four new Firestone Firehawk Indy 500 tires for the new rims, but then found out that the 15 inch wheels did not fit under the front fenders. That pretty much finished out 2010. I didn't get a whole lot done in 2010. About the time the weather warmed up, I was hit by a couple of medical problems. It wasn't until later in the Fall that I bought a fiberglass trunk lid and found out I had some work to get it mounted. Turns out that it came in two parts: the outer shell and the inner ribbed section. Since I ordered the model that had a "frenched" license plate section in the outer shell, the inner section needed to be modified to clear the depressed license area. Also all of the mounting areas for hinges and latch needed to be drilled. There were 20 holes to drill with 10 into reinforcing plates that also needed to be tapped. I am still working on it and plan a separate posting to describe the separate steps involved with mounting it. In the meantime, here is what the car looks like. |
Bubble Flare
11/09/10 11:30
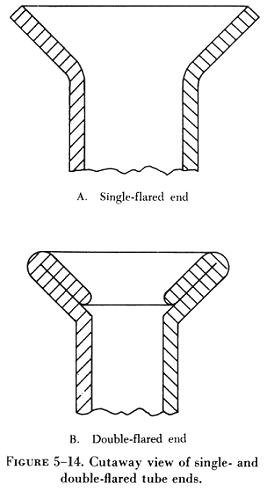
| Last week, my daughter mentioned that the brakes on our 1993 Buick Century were not working very well. The next morning, after driving it around the block, it barely stopped back in the driveway. Further investigation showed that the brake-line to the passenger side rear wheel had rusted and sprung a leak. Since I could not drive it further and I had replaced brake-lines before, I decided to fix it myself. Now, typically, all cars that I have worked on had one brake-line to the rear axle which then had one flexible hose splitting to two steel brake-lines, one to each rear wheel. This car had had separate brake-lines and hoses to each rear wheel. The brake-line was over 13 feet long and was routed around the engine and firewall. Since most of the brake-line was solid with surface rust, I thought I could cut it off and splice in a new section. That's when the "fun" began. The first rule of fixing an old car should be to take off the old part and take it with you to the auto part store. That I did not do. I went to one of my local auto part stores and picked up a 60" brake-line, some fittings and a new brake hose. Might as well replace the hose at the same time. Well, it turned out that the new brake hose did not match the old one and I had to make my second trip to the parts store. That parts store did not have the correct hose, even though their computer said the hose was for a 93 Buick. So I picked up a correct hose at another store. By then I had the old hose with me to match it up. Note that I also borrowed a brake-line flaring tool at the first store so I quickly cut the old line, flared it and connected it with the new brake-line and hose. Now it should be a simple job of getting the air out of the brake-line. Problem was that both connections in the brake-line leaked. I tightened the connection from the new line to the new hose, but stripped the threads. Back to the second parts store for a new hose and brake-line. Luckily, at this point the parts only cost about $20. Back home, I cut some more off the old brake line since my first flare was not good enough and I had some extra bends in the new line to allow for such problems. I could just stretch the new line out another inch to make another flare. But my second attempt was no good as well probably because the old line was rusty. I went back to the first parts store another 8" brake line and couple more fittings since the first line would not stretch any further and I need to get farther along to a better portion of the old brake line. Well, the new 8" brake line would not even screw into the fittings. Another trip back to the first parts store showed that they had given me a "Japanese" brake line with a larger diameter fitting. My trust in this store giving me the right parts was waning by this time. Unfortunately my third flaring attempt was unsuccessful as well and my 48 hour loan on the flaring tool was nearing its end. At this point, I decided that I would just replace the whole 13 foot brake-line with one piece, but I had to buy a 25 foot roll of brake-line to do it. Another $25. After a few days rest on the weekend, I got back into fitting the new long brake-line. I cut off about 14 feet of the roll to use. I bent the rear end of the line to fit around the axle, flared and connected it to the hose and routed the rest of the line up to the master brake cylinder on the driver's side of the engine compartment. I did not remove all of the old brake-line and ran the new line near the top of the firewall where it was easier to work with and bend. A big problem was figuring out which of the four brake-lines at the master cylinder was the correct one to replace. A repair manual would have helped. My first guess after trying to follow the two left brakes lines under the firewall was wrong. I tested the line by injecting brake fluid into it with a syringe. When it didn't come out the other cut off end, I tried the other line which passed the brake fluid. I cut the fitting off the old brake-line and reused it since it was a different thread. After pressure testings the new connected line, I discovered that the fitting at the rear wheel leaked and was still incorrect. In checking with the parts store, I found out that the flare not only needed to be a bubble-flare, but the fitting needed to be a European metric thread. So what is this thing called a "Bubble Flare"? I discovered that my 93 Buick did not have standard flared brake-lines. Actually, the standard is called a |
Mecum Auction & New Wheels
21/06/10 12:21
| monday, 21 june 2010 12:21 |
| Well, I didn't get the frame fixed in time to take the 37 Chevy to the |
1937 Chevy Coupe
05/06/10 20:57
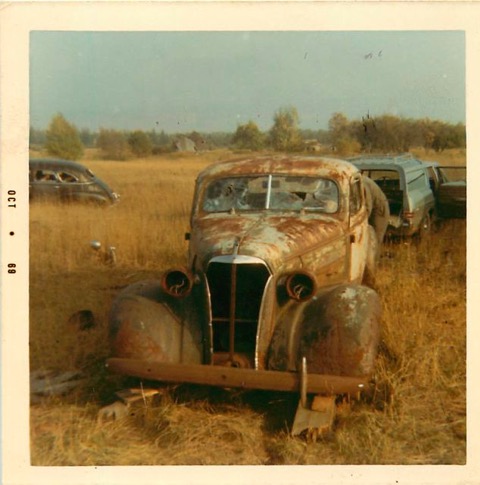
| I have owned a 1937 Chevy Master Deluxe Business Coupe for over 41 years. The following picture shows it back in October 1969 when I first found it near Rabbit Bay in the Keweenaw Peninsula of Upper Michigan while I was attending Michigan Technological University. The owner of the property where it was sitting gave it to me and I was able to get a "red" lost title in Michigan. Since then, it has been licensed in Iowa, Ohio, Illinois and Minnesota. |
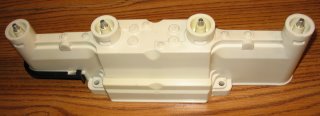
Ignition Coil Housing
09/04/06 18:00
| sunday, 09 april 2006 18:00 |